
If your are familiar with importing presets into Adobe Media Encoder skip to the bottom of the page to download a zip file that contains the settings that may be imported into Adobe Media Encoder.
Prior to Export verify that audio meets the ATSC A/85 specification using the Loudness Monitor plugin in Adobe Premiere to verify compliance. A compressor limiter plugin on the left and right audio tracks may be used to bring audio into compliance.
To manually setup the encoder follow the instructions below.
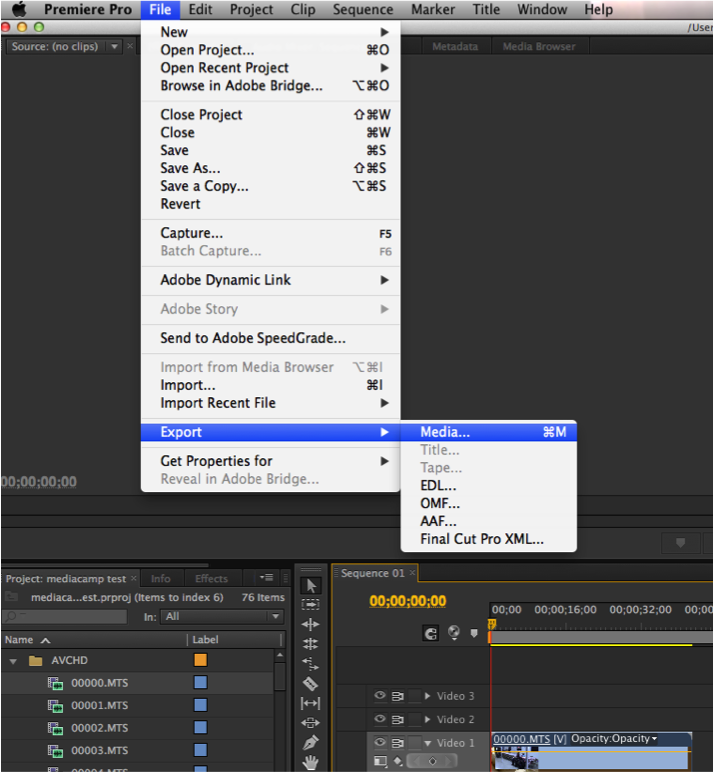
- Select the timeline that you want to export and click File -> Export -> Media…
- The Export Settings window will come up.
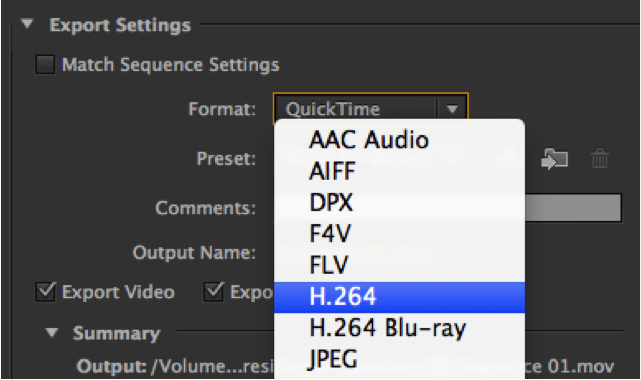
- Choose 264 for the Format:
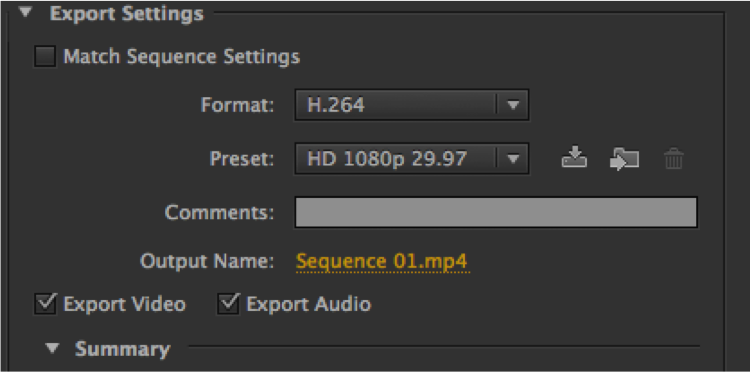
- Next select HD 1080p 29.97 as the Preset:

- Click the Output Name:
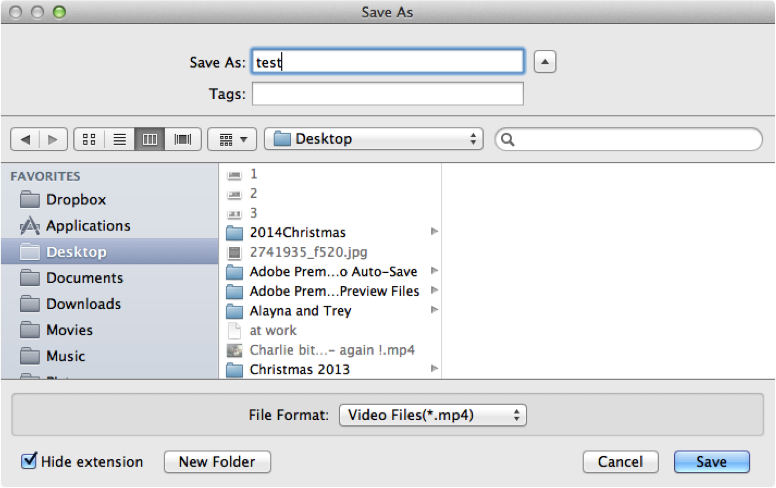
- The Save As window will appear. Name your file and select the location where you would like to save it and click Save.
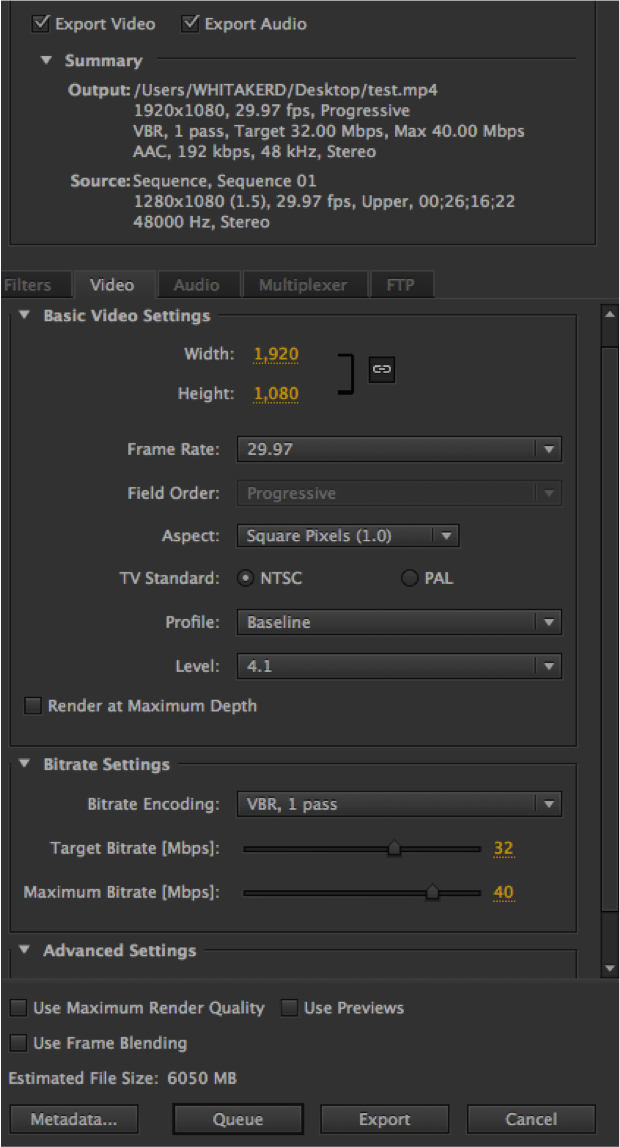
- Make sure that Export Video and Export Audio are both checked. Match your settings up with the ones below.
- Take note that the Width: and Height: are 1920 x 1080,
- Frame Rate: is 29.97 and
- Profile: is Baseline
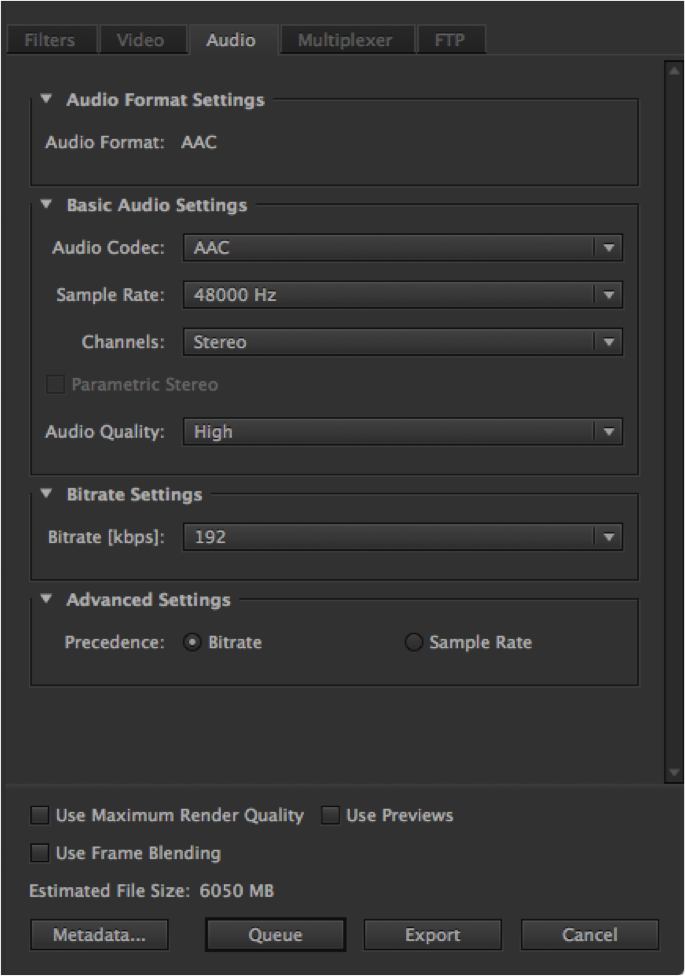
- Next click the Audio tab. Match your settings to the ones below.
Make sure Sample Rate: is set to 48000 Hz
- Finally click Export and your export will begin.
If you prefer a more automated setup below are links to preset files for Adobe Media Encoder. The files may be downloaded, extracted and then imported through Adobe Media Encoder.
0 Comments